
GO TO PORTAL
Welcome to our Customer Portal
You can enrol and access your Y whenever you need it. The Y is in your hands. Take part in the Y community, anyway you choose, and keep track of it all from your phone.
Get more information at your fingertips and access your favourite Y activities more easily with our secure portal that empowers you to take charge of your experiences. We’re making it simple and easy for you to take care of you and your family’s activities and enjoy more of life with your friends and whanau.
Portal benefits

Children's Term Programmes
- Sign-up your child/ren for our term programmes
- View your child/ren’s progress
- See notifications about cancellations or changes
- Use your dashboard to see outstanding payments, manage your membership and personal details
- View location and contact information for your local Y
- Be safe and secure

Gym Memberships
- Sign-up, renew, extend and update your memberships
- Make payments via the Online Customer Portal
- View location and contact information for your local Y
- Be safe and secure
- Use your dashboard to see outstanding payments, manage your membership and personal details

Sports Teams and Leagues
- Be safe and secure
- See notifications about cancellations or changes
- Use your dashboard to see outstanding payments, manage your membership and personal details
- View location and contact information for your local Y
- Check out game times and the league ladder for all your team sports
- Reserve team spot and manage your fixtures

Fitness Group Classes
- View class schedules
- Sign-up for fitness classes
- See notifications about cancellations or changes
- Use your dashboard to see outstanding payments, manage your membership and personal details
- View location and contact information for your local Y
- Be safe and secure
Venue Hire
- Reserve a space, venue, court or pool lane
- See availability of spaces/venues in live mode
- View location and contact information for your local Y
- Be safe and secure
- Use your dashboard to see outstanding payments, manage your membership and personal details
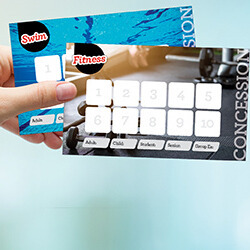
Concession Passes
- Top up passes in the portal (concessions)
- Be safe and secure
- See how many sessions you have left on your pass
- Use your dashboard to see outstanding payments, manage your membership and personal details
- View location and contact information for your local Y
- Get reminders when you only have a couple of sessions left
GO TO PORTAL
Quick Guides
Create an Account
You’ll need to register the first time you log in– follow the instructions below.
Once you've registered, you can log in to the portal anywhere, any time, on any device with internet access – computer, smartphone, or tablet.
Use the same email we have for you. If that email is not unique to you but shared with family (over 18) who are also members, a message will prompt you to contact us with an alternative email address. We will let you know when we amend your personal record, so you can register online.
It will take you about five minutes to create an account.
TOP TIP:
Use our portal on Chrome or Edge web browsers.
If you don’t receive the email promptly, please check your Junk folder. Some companies block emails such as these, so best use your personal email instead.
Please note: The Y Portal can't be used outside of New Zealand - for assistance please contact your Y centre directly.
How to sign up:
1. To get started and create an account, navigate to the link provided to you.
2. Click the log in button in the top right-hand side of the banner.
3. Select ‘create an account’ then enter your email address
4. Click agree to membership terms and conditions. Click ‘continue’.
5. A message will display advising a verification email is sent.
6. Open your email server. Find The Y verification email. The email will come from us and includes a link to click to complete the verification. In the email, click on the link to be directed to this page. Here you will be asked to create a password.
7. Next step is to fill out your details including your new password – the details with Asterix are compulsory.
8. Click Continue. You are now all set up to manage your Y.
How to create a bookmark for your phone
Optimise your time and maximise the convenience of signing up for classes from your mobile! It’s easy to use, and you can access your account via a smartphone, tablet, or computer.
Create a shortcut by adding the below URL to your favourites.
For iPhones
Create a website bookmark and save it onto your iPhone's home screen:
- Launch the Safari browser on your iPhone.
- Navigate to the website that you want to bookmark.
- Tap on the share icon at the bottom of the screen (the icon looks like a square with an upward arrow).
- Scroll down and select "Add Bookmark".
- Choose a name for your bookmark and select the folder where you want to save it. You can also edit the URL if you want.
- Tap on "Save".
- Now, to add the bookmark to your home screen, go back to the Safari browser and tap on the bookmark’s icon (the icon looks like an open book).
- Find the bookmark you just created and tap and hold on it until a menu appears.
- Select "Add to Home Screen".
- Choose a name for the shortcut and tap on "Add".
- The website shortcut will now appear on your iPhone's home screen.
That's it! You can now easily access the portal/envibe by tapping on the shortcut on your home screen.
And for Android phones
Create a website bookmark and save it onto your Android’s home screen:
- Open your device's web browser (e.g. Google Chrome, Firefox, etc.).
- Navigate to the website you want to create a bookmark for.
- Tap on the three dots located at the top right corner of the browser to open the options menu.
- From the options menu, select "Add to Home Screen."
- You may be asked to name the bookmark, so type a name that you will easily recognize.
- After naming the bookmark, tap on "Add" or "Save" (depending on the browser you're using).
- The bookmark icon will now appear on your home screen.
That's it! You've successfully created a website bookmark and saved it to your home screen. Now, you can easily access Your Y with just a tap.
Enrolling into Swim Lessons
Taking this online means the power to organise you and your family's life is now in your hands, when you've got free time.
Enrol quickly and easily online
- From the portal landing page, click on Courses.
- Select ‘New Enrolment’
- Click the location/centre you wish to book with.
- Select program – Learn to Swim.
- Select your applicable level (Note: determine your level from the flow chart which can be found here.
- Click CONTINUE.
- Select the day of the week, and class time you wish to attend.
- Click the time slot suitable for you (Note: you will see all classes on that day. Enrolling early will ensure your child will get a space in the programme).
- Select the start date (it defaults to the next week’s class).
- Click continue.
- At the next step you will be prompted to log in (if you aren’t already).
- Enter your email address and password – click log in.
- Once logged in, you will be taken back to your selections, click continue.
- Summary of selection is displayed. Select the frequency you wish to pay, weekly or fortnightly.
- Enter details of who this enrolment is for, agree to the terms and conditions and click continue.
- Your cart summary will display; click continue to Debit sign up. (Note: the cost is a zero as you are not paying upfront. You are setting up a DD for payment each week or fortnight).
- Summary will display again, click direct debit sign up.
- Complete required fields.
- Complete payment details, agree to T&Cs then click submit.
- Summary will appear. Click complete purchase.
- Enrolment is now complete. You will now be sent a confirmation email.
Enrolling into Children's Recreation
Enrol online quickly and easily!
- From the portal landing page, click on Courses.
- Select ‘New Enrolment’.
- Click the location/centre you wish to book with.
- Select program – Kids Rec Basketball or Kids Rec Gymnastics.
- Select your applicable level (Note: level refers to your kid’s age).
- Select the day of the week, and class time you wish to attend.
- Click the time slot suitable for you (Note: you will see all classes on that day. Enrolling early will ensure your child will get a space in the programme).
- Select the start date (it defaults to the next week’s class).
- Click continue.
- At the next step you will be prompted to log in (if you aren’t already).
- Enter your email address and password – click log in.
- Once logged in, you will be taken back to your selections, click continue.
- Summary of selection is displayed. Select the frequency you wish to pay, weekly or fortnightly.
- Enter details of who this enrolment is for, agree to the terms and conditions and click continue.
- Your cart summary will display; click continue to Debit sign up. (Note: the cost is a zero as you are not paying upfront. You are setting up a DD for payment each week or fortnight).
- Summary will display again, click direct debit sign up.
- Complete required fields.
- Complete payment details, agree to T&Cs then click submit.
- Summary will appear. Click complete purchase.
- Enrolment is now complete. You will now be sent a confirmation email.
Manage multiple enrolments
Forget the feeling of FOMO when making multiple bookings for your children online.
Enrol multiple children on the same or different courses in one web cart transaction.
Save time and remove the risk of a course becoming booked out while enrolling and paying for each child individually.
Perfect for busy families!
- After you have completed enrolling one child in their course, there is an option to enrol another student. Click this button. NOTE: When making multiple enrolments, only classes at the same site will be displayed. Everyone being enrolled with direct debit plans must have the same parent/guardian.
- Select your enrolment type from the options provide. Select The Y Centre (it will only offer the option of the Y centre you selected for your first child’s enrolment).
- Select the program e.g. Learn to Swim.
- Select the appropriate level for your child.
- Click continue.
- Select the time and day of the week for classes you want from the schedule.
- Select a starting date.
- Click continue.
- Your cart summary will display; click continue to Debit sign up. (Note: the cost is a zero as you are not paying upfront. You are setting up a DD for payment each week or fortnight)
- Summary of selection is displayed again.
- Enter details of who this enrolment is for, agree to the terms and conditions and click continue.
- Your cart summary will display; click continue to Debit sign up. (Note: the cost is a zero as you are not paying upfront. You are setting up a DD for payment each week or fortnight).
- Complete payment details, agree to T&Cs then click submit.
- Summary will appear. Click complete purchase.
- Enrolment is now complete. You will now be sent a confirmation email.
Track course progress
View your child’s progress through the course, and the assessment they have completed giving you more visibility over your child’s experience.
Receive notifications when your child has achieved a level or is ready to move to the next stage.
Once your child has progressed to the new level it will show up in your customer portal under the Courses menu option and you’ll be able to choose the time and day that suits you for the new class.
How to track your child’s progress:
- Log in to the member portal.
- Click Courses
- You will see your enrolment/s
- Select your child
- Click ‘view progress’ in the top right-hand corner
- You will be able to view the required skills for your child’s level, and how they are tracking against these.
View and Book Group Fitness Classes
Quickly and easily enrol in the session of your choice online in advance or while you’re in the club.
How to view and book:
- To View Timetable – click on the group fitness tile.
- To narrow the choice, click on the centre you are interested in.
- You can now browse all the classes without needing to log in.
- To book a session – click on the class you want, and the following screen will appear.
- Click on ‘Join this session’. If the ‘Join this session’ button is not displayed, you will need to log in.
- You will receive confirmation of the booking. You do not need to present it at your centre.
- Use your membership card to swipe upon arrival and go to class.
Cancel a Group Fitness Class Booking
We know people's plans change! Make sure you free a space up for someone else to attend by cancelling your booking if you can't attend.
How to change a booking:
- If your plans change, and you need to cancel the class, login then go to ‘view admission tickets’.
- Click on the session you wish to cancel, then click ‘cancel admission’.
- It will ask if you are sure – click cancel admission.
- Cancellation is now complete. It is easy as that!
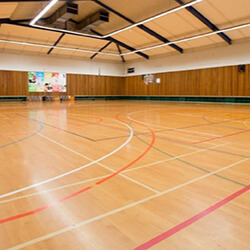
Hire a Space
Venue and Facility online bookings are available for portal users, allowing you to control the spaces you book and manage more complex booking types.
Check the availability of facilities, courts, pool lanes or venues before making a booking. Make a deposit immediately and secure your space.
Get specific when you book a space. No phone calls required, just request a preferred tennis court, meeting room or swimming lane when making your booking in the customer portal.
How to Hire a Space:
- Find the right space/venue for you
- Select a booking type
- Select a Resource
- Select a time - for instance, Tennis, Court 2, from 5-6 pm, respectively.
- Book and pay online (deposit)